Short Answer for Photographers
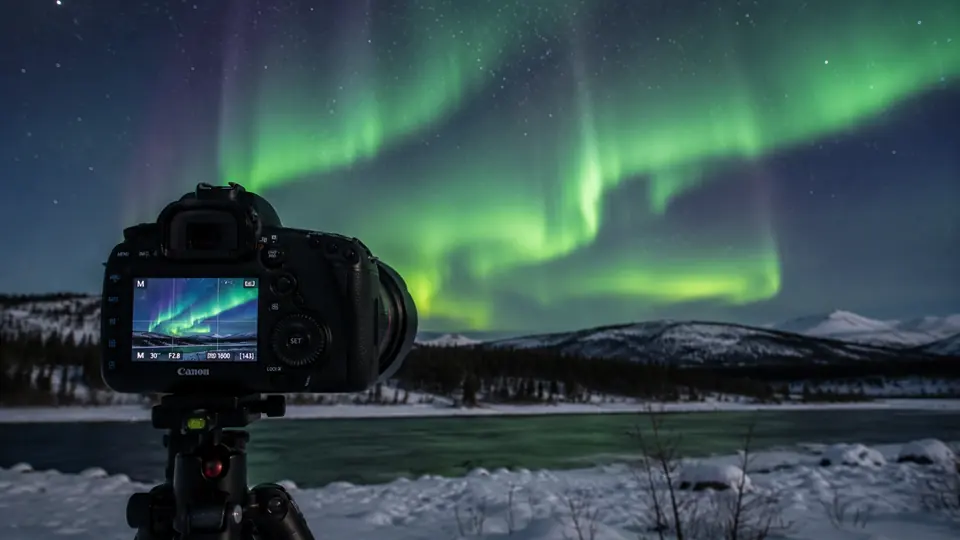
Use manual mode. Start around ISO 1600–3200, f/2.8 and 3–8 seconds depending on aurora brightness and movement. Focus manually on a bright star, use a stable tripod, shoot RAW and review the first image at 100% magnification. If the aurora starts moving quickly, shorten shutter speed before changing everything else.
The best Northern Lights camera settings are not fixed numbers. Aurora brightness, movement speed, moonlight, cloud cover, lens quality and camera sensor performance all affect the final exposure. The best photographers adjust continuously instead of relying on one permanent setup.
Why Northern Lights Camera Settings Matter
Northern Lights photography is technically different from normal night photography because the sky itself moves. A weak green arc may barely shift for several minutes, while a bright aurora corona above Kiruna can change shape every second.
This means the correct settings depend on balancing three things at the same time:
- Brightness
- Motion
- Image quality
Long exposures brighten the scene but blur fast aurora movement. High ISO values brighten the image but increase visible digital noise. Wide apertures collect more light but can reduce edge sharpness on some lenses.
This is why experienced aurora photographers constantly adapt settings during the night instead of using one permanent setup copied from the internet.
Local Insight
In Kiruna and Abisko, many of the best aurora nights are also the coldest nights. Camera settings matter, but preparation matters just as much. Dead batteries, frozen fingers and soft focus ruin more aurora photos than expensive camera limitations.
Best Starting Camera Settings for Northern Lights
If you are standing outside in Swedish Lapland and need a reliable starting point, use these settings first and adjust from there.
| Setting | Recommended Starting Point | Why It Works |
|---|---|---|
| Mode | Manual | Prevents incorrect automatic exposure decisions. |
| ISO | 1600–3200 | Strong balance between brightness and noise. |
| Aperture | f/2.8 or wider | Lets in enough light for shorter exposures. |
| Shutter speed | 3–8 seconds | Good balance for moderate aurora movement. |
| Focus | Manual focus on star | More reliable than autofocus in darkness. |
| White balance | 3500K–4500K | Keeps snow and sky looking natural. |
| File format | RAW | Preserves maximum editing flexibility. |
| Stability | Tripod + timer | Prevents vibration during long exposure. |
Quick Aurora Setup Checklist
- Switch to manual mode.
- Set ISO between 1600 and 3200.
- Open the aperture fully if possible.
- Start with 5 seconds shutter speed.
- Turn autofocus off.
- Focus manually on a bright star.
- Use a stable tripod.
- Use RAW format.
- Review the first image at 100% zoom.
Best ISO for Aurora Photography
ISO controls image brightness amplification. For Northern Lights photography, ISO 1600–3200 is usually the best working range on modern cameras.
Lower ISO gives cleaner files but may require longer exposures. Higher ISO brightens the image but can introduce strong digital noise, especially on older cameras or smaller sensors.
| ISO | Best Use | Main Risk |
|---|---|---|
| ISO 800 | Bright aurora or moonlit snow | Weak aurora may become too dark. |
| ISO 1600 | Strong all-round starting point | May still require longer exposures. |
| ISO 3200 | Weak aurora and darker conditions | Visible noise on weaker cameras. |
| ISO 6400 | Emergency low-light situations | Heavy noise and reduced detail. |
Start around ISO 1600–3200. If the aurora becomes very bright or starts moving quickly, reduce ISO or shorten shutter speed before increasing exposure further.
Best Aperture for Northern Lights
A wide aperture is one of the biggest advantages in aurora photography. Lenses at f/1.4, f/1.8 or f/2.8 allow much shorter exposures than slower kit lenses.
Fast wide-angle lenses are often more valuable for aurora photography than extremely expensive camera bodies.
| Aperture | Performance | Practical Advice |
|---|---|---|
| f/1.4 | Excellent light gathering | Very strong for fast aurora movement. |
| f/1.8 | Excellent balance | One of the best practical aurora apertures. |
| f/2.0 | Very strong | Sharp and bright for Arctic night photography. |
| f/2.8 | Professional standard | Reliable on many wide zoom lenses. |
| f/3.5–f/4 | Usable but limited | Requires higher ISO or longer exposures. |
Best Shutter Speed for Northern Lights
Shutter speed controls both brightness and motion blur. This is usually the most important creative adjustment during aurora photography.
Long exposures brighten weak aurora but blur fast movement. Short exposures preserve structure and detail during strong active displays.
| Aurora Type | Recommended Shutter Speed | Why |
|---|---|---|
| Weak slow arc | 8–15 seconds | Needs longer exposure for brightness. |
| Moderate aurora | 4–8 seconds | Best general balance. |
| Fast-moving curtains | 1–4 seconds | Preserves visible structure. |
| Bright corona overhead | 0.5–2 seconds | Prevents overexposure and blur. |
| Moonlit landscape | 2–6 seconds | Moonlight brightens the foreground naturally. |
Local Insight
During strong aurora storms near Kiruna, many visitors keep using long exposures because they started with weak aurora settings earlier in the evening. When the aurora suddenly becomes active, reduce shutter speed quickly or the structure disappears into a soft green blur.
Manual Focus in Arctic Darkness
Focus problems ruin more aurora photos than wrong ISO settings. Autofocus struggles heavily in darkness and snow.
The safest method is manual focus using live view:
- Find a bright star or distant light.
- Zoom in digitally on the screen.
- Adjust focus manually until the point becomes sharp and small.
- Leave focus untouched afterward.
| Focus Method | Reliability | Best Use |
|---|---|---|
| Autofocus in darkness | Poor | Avoid if possible. |
| Manual focus on star | Excellent | Best overall method. |
| Manual focus on distant light | Very good | Useful near roads or cabins. |
| Infinity lens marking | Unreliable | Often inaccurate on modern lenses. |
Best White Balance for Northern Lights
A white balance around 3500K–4500K usually produces natural-looking snow and sky colours.
Auto white balance can shift unpredictably between frames, which makes editing harder later. Consistent manual white balance gives cleaner results.
RAW vs JPEG
RAW files preserve much more image information than JPEG files. This matters heavily for night photography because aurora images often require:
- Exposure correction
- Noise reduction
- White balance adjustment
- Highlight recovery
- Shadow recovery
JPEG is acceptable for casual sharing, but RAW is significantly safer for serious aurora photography.
RAW format is one of the biggest quality advantages for Northern Lights photography because night scenes often need careful editing afterward.
Camera Settings by Aurora Strength
| Situation | ISO | Aperture | Shutter Speed | Notes |
|---|---|---|---|---|
| Weak aurora arc | 3200–6400 | f/1.8–f/2.8 | 8–15 sec | Longer exposure helps weak brightness. |
| Moderate green band | 1600–3200 | f/1.8–f/2.8 | 4–8 sec | Best all-round setup. |
| Fast-moving aurora curtains | 1600–3200 | f/1.4–f/2.8 | 1–4 sec | Shorter exposure preserves structure. |
| Bright overhead corona | 800–1600 | f/1.4–f/2.8 | 0.5–2 sec | Reduce exposure quickly. |
| Moonlit snow scene | 800–1600 | f/2–f/2.8 | 2–6 sec | Moon brightens the landscape naturally. |
Settings by Camera Type
| Camera Type | Recommended Start | Expected Result |
|---|---|---|
| Full-frame mirrorless | ISO 3200, f/2.8, 4–6 sec | Excellent detail and low noise. |
| Full-frame DSLR | ISO 3200, f/2.8, 5 sec | Strong night performance. |
| APS-C camera | ISO 1600–3200, f/2.8, 5–8 sec | Very good with fast lens. |
| Micro Four Thirds | ISO 1600–3200, f/1.8–f/2.8, 5–10 sec | Usable but more noise-sensitive. |
| Modern smartphone | Night mode + tripod | Good for memories and social media. |
Best Smartphone Settings for Northern Lights
Modern smartphones can photograph strong aurora surprisingly well, especially with stable support and dark skies.
Smartphone Aurora Checklist
- Use night mode or long exposure mode.
- Place the phone on a tripod.
- Turn flash off.
- Use a timer to avoid movement.
- Avoid nearby streetlights.
- Reduce exposure manually if the aurora becomes very bright.
- Clean the lens before shooting.
Common Northern Lights Photography Mistakes
- Using autofocus in darkness.
- Using very long exposures during fast aurora movement.
- Not checking sharpness after the first image.
- Using unstable tripods in wind.
- Keeping spare batteries in outside pockets.
- Shooting only JPEG.
- Ignoring foreground composition.
- Overexposing bright aurora until structure disappears.
- Using headlamps carelessly around other photographers.
- Expecting the aurora to look identical to edited social media images.
Cold-Weather Camera Handling
Arctic winter affects batteries, lenses, screens and tripods. Cold-weather handling matters as much as technical settings.
| Problem | Solution | Why It Matters |
|---|---|---|
| Battery drain | Keep spare batteries warm inside jacket. | Cold reduces battery performance quickly. |
| Lens condensation | Warm camera slowly inside a sealed bag. | Prevents moisture damage and fogging. |
| Frozen tripod locks | Keep tripod dry and free of snow. | Frozen joints become difficult to adjust. |
| Cold hands | Use liner gloves under mittens. | Allows control without exposing skin long. |
| Snow on lens | Use lens hood and microfiber cloth. | Protects image sharpness. |
Best Northern Lights Photography Locations Near Kiruna
| Location | Photography Strength | Main Limitation |
|---|---|---|
| Abisko National Park | Dark skies and mountain scenery | Requires travel planning from Kiruna. |
| Lake Torneträsk | Wide open horizons | Wind and ice safety matter. |
| Poikkijärvi | Open views near Kiruna | Conditions vary by weather. |
| Nikkaluokta area | Strong mountain atmosphere | Longer winter drive required. |
| Dark areas outside Kiruna | Convenient and accessible | Some light pollution remains. |
Local Insight
The best aurora photo location is not always the most famous one. A safe dark roadside pull-off with clear skies often produces better images than crowded viewpoints with difficult foregrounds or heavy wind.
Realistic Expectations
Cameras collect light differently from human eyes. This means many aurora photos appear more colourful than the scene looked naturally during the moment.
Weak aurora often looks pale green or grey-white to the eye while appearing brighter in long-exposure photographs. Strong aurora storms can become vividly visible naturally, but most displays are subtler than heavily edited social media images suggest.
A good aurora photo does not always represent exactly what your eyes saw. It represents what the camera sensor collected during the exposure.
Final Verdict
The best Northern Lights camera settings are flexible starting points, not fixed formulas. Begin around ISO 1600–3200, f/2.8 and 3–8 seconds, then adjust continuously depending on aurora brightness and movement.
Shorter shutter speeds preserve fast-moving aurora structure. Longer exposures help weaker displays. Manual focus, RAW format and a stable tripod matter more than buying the most expensive camera body.
In Kiruna and Swedish Lapland, the strongest aurora photographs usually come from combining technical skill with Arctic preparation: warm batteries, warm hands, realistic expectations and safe dark locations.